How to Create Your First Python 3.6 AWS Lambda Function
Amazon Web Services (AWS) Lambda provides a usage-based compute service for running Python code in response to developer-defined events. For example, if an inbound HTTP POST comes in to API Gateway or a new file is uploaded to AWS S3 then AWS Lambda can execute a function to respond to that API call or manipulate the file on S3.
AWS Lambdas are not related to the Python languages' lambda expressions,
which are used to create anonymous functions. The AWS Lambda name just
happens to collide with the the lambda keyword's name.
Let's learn how to quickly write and run a Lambda function to execute basic Python 3.6 code which uses environment variables as input. This code, which is also available on GitHub under the blog-post-examples repository can be changed so that you can build much more complicated Python programs.
Our Tools
No local development environment tools are required for this tutorial, other than a web browser. All the work will happen on AWS via their Console.
These steps can also be completed from the command line via the boto3 library, but we won't cover that in this post.
If using Python 2 is still your jam rather than Python 3, take a look at this other post which shows how to execute Python 2.7 code on AWS Lambda.
First Steps with AWS Lambda
Sign up for a new Amazon Web Services account, which provides a generous free tier, or use your existing AWS account.
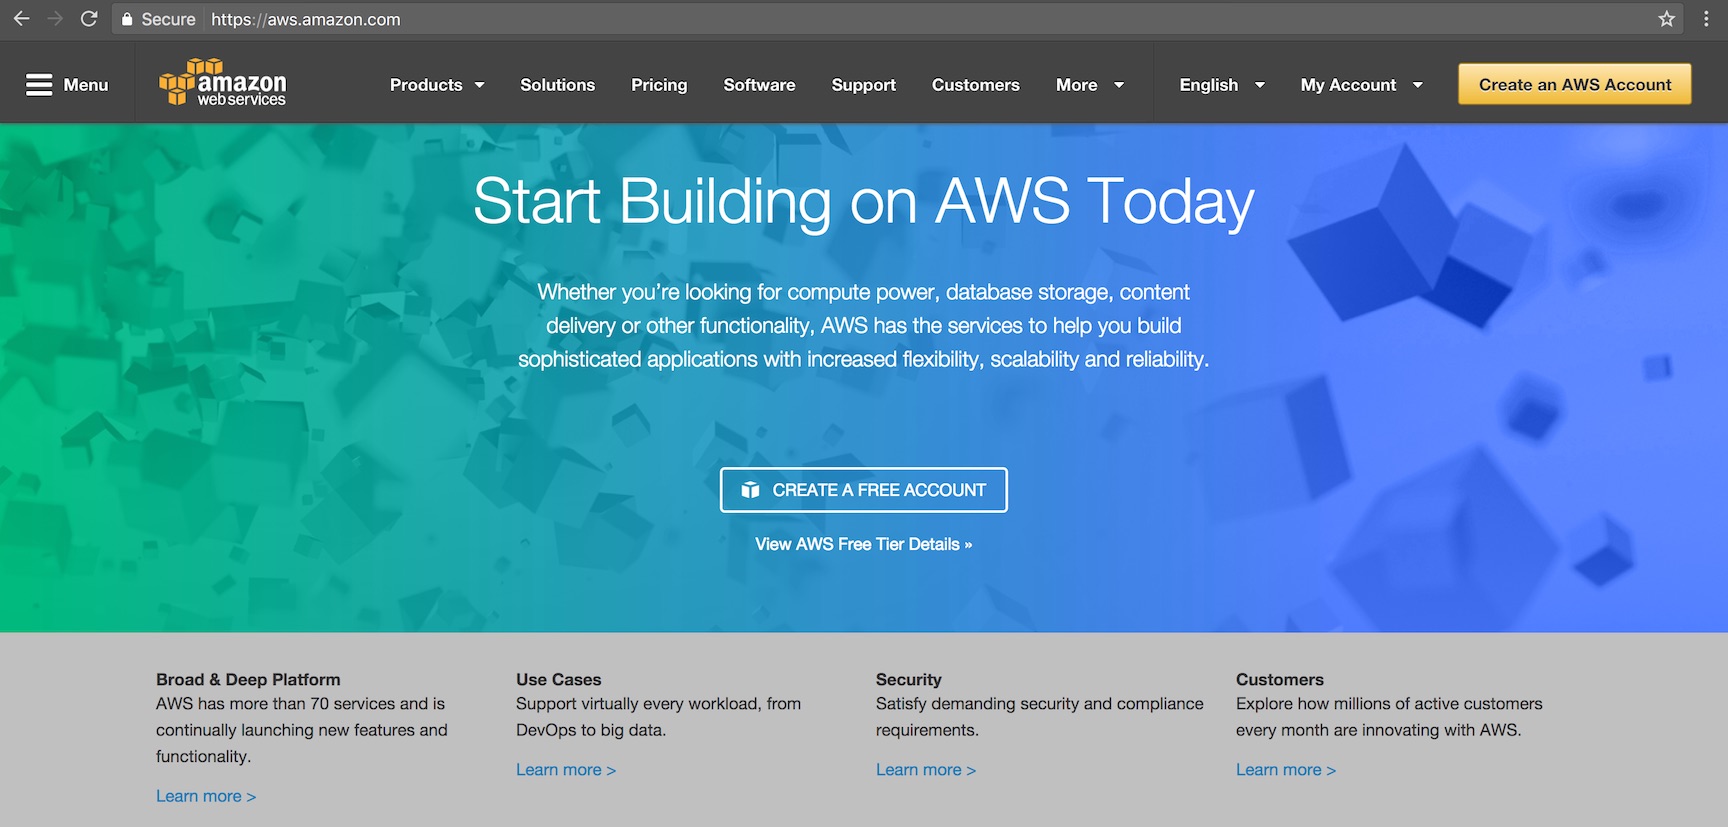
After signing up a few tutorials may pop up, but skip past them and go to the main Console. AWS has tons of services, with more being added every month, so using the search box is the best way to get around. Select the search text box, enter "lambda" and select "Lambda" to get to the Lambda starting page.

Click the "Create a Lambda function" button. The "Select Blueprint" page will appear.

Select "Blank Function" and the "Configure triggers" page will come up. It was non-obvious to me at first, but you don't actually need to configure a trigger to move on. A trigger is how the Lambda function typically knows when to execute based on an event from another AWS service such as API Gateway or Cloudwatch.
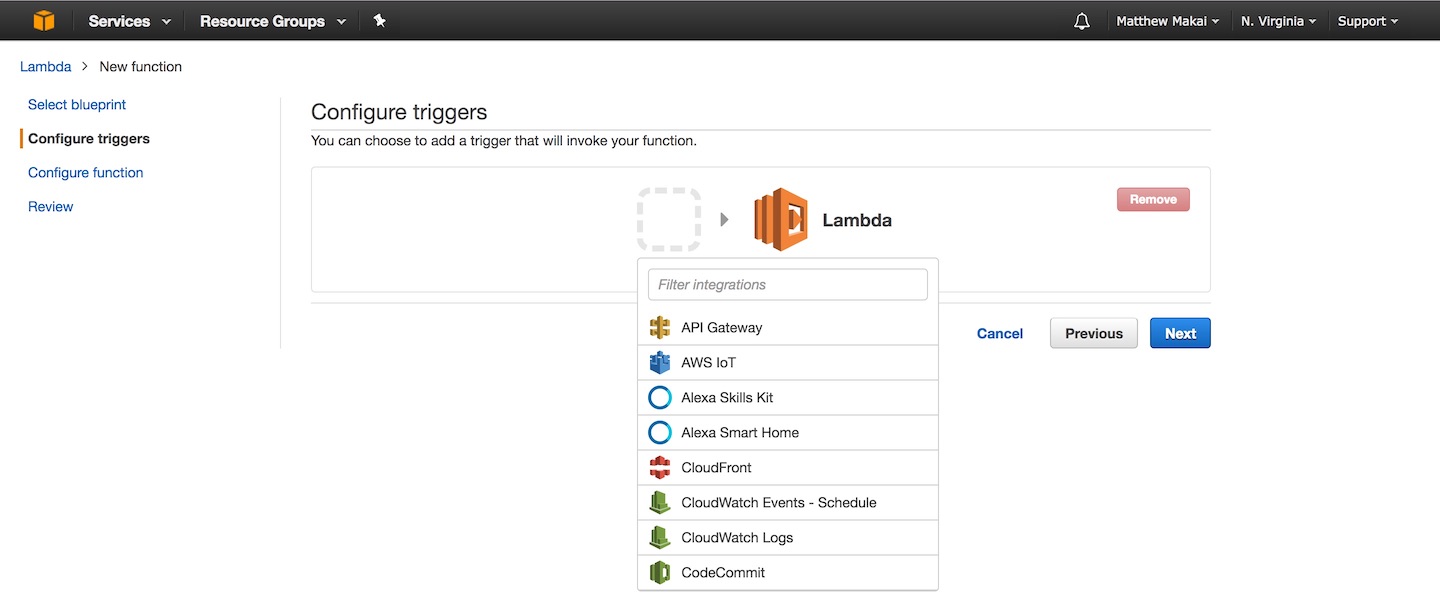
We won't configure a trigger for this function because we can manually kick off the Lambda to test it when we are finished configuring it. Leave the trigger icon blank and click the "Next" button to move along.

Next we get to the "Configure function" screen where we can finally write some code!
Python Code for Our Lambda Function
Enter a name for the Lambda function, such as "python_3_6_lambda_test", as well as a description. A description is optional but it is useful when you have a dozens or hundreds of different Lambda functions and need to keep them straight. In the Runtime drop-down, select Python 3.6 for the programming language.
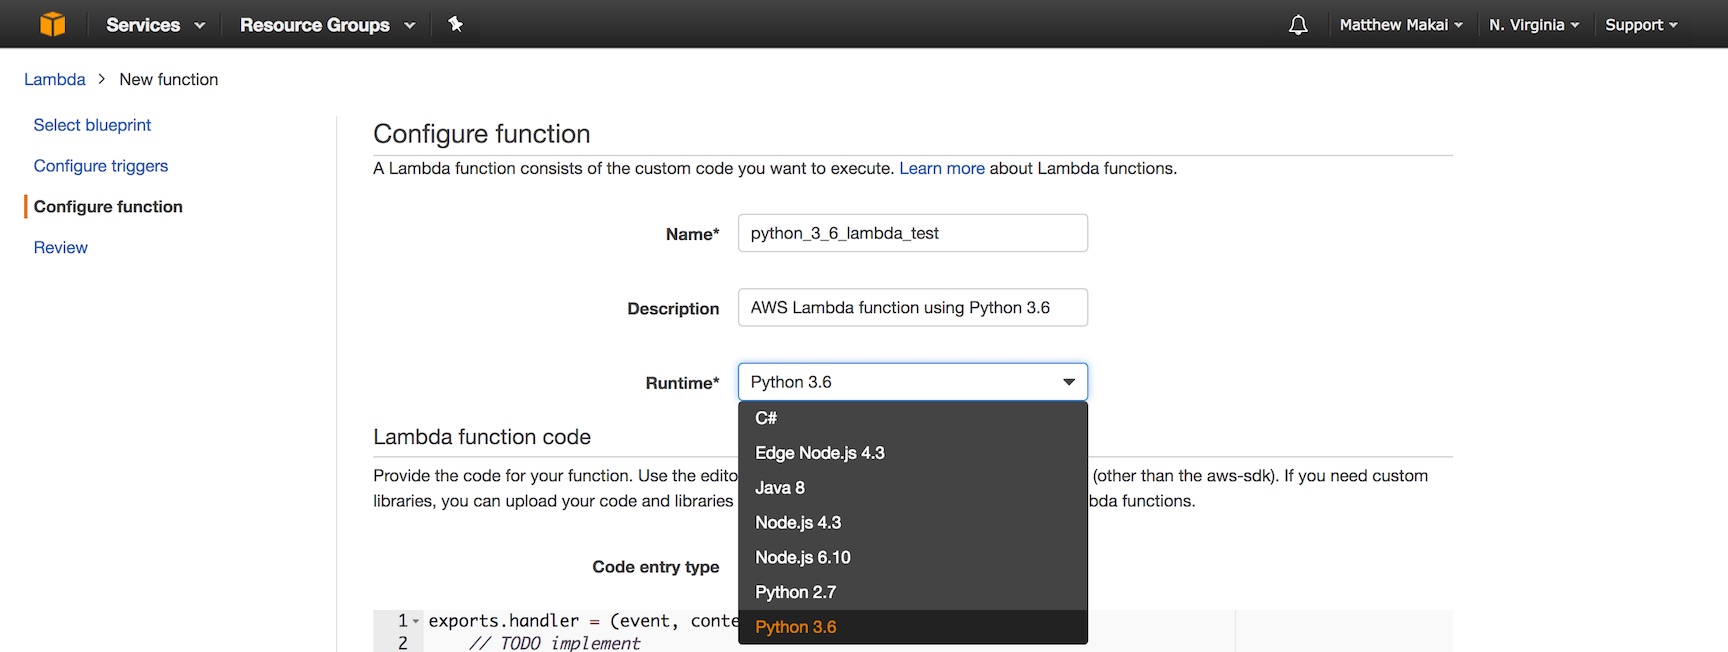
Beneath the Runtime drop-down there is a large text box for code,
prepopulated with a lambda_handler function definition. The
"Code entry type" drop-down can also be changed to allow uploading a ZIP
file or inputing a file from an S3 bucket. For our simple first
Lambda function we will stick to the "Edit code inline" option. Copy or type
in the following code, replacing what is already in the text box. This
code is also available on this open source GitHub repository.
import os


def lambda_handler(event, context):
    what_to_print = os.environ.get("what_to_print")
    how_many_times = int(os.environ.get("how_many_times"))

    # make sure what_to_print and how_many_times values exist
    if what_to_print and how_many_times > 0:
        for i in range(0, how_many_times):
            # formatted string literals are new in Python 3.6
            print(f"what_to_print: {what_to_print}.")
        return what_to_print
    return None
The code above contains a required lambda_handler function, which is
AWS Lambda's defined hook so it knows where to begin execution. Think of
lambda_handler as a main function, like the
if __name__ == "__main__": conditional line commonly used in Python files
to ensure a block of code is executed when a script is run from the
command line.
The Python code expects two environment variables that are read by the
os module with the environ.get function. With the what_to_print and
how_many_times variables set by the environment variables, our code then
prints a message zero or more times, based on the amount defined in
the how_many_times variable. If a message is printed at least once then
the function returns the what_to_print string, if nothing is printed
then None is returned.
Below the code input text box on this function configuration screen there is a section to set environment variable key-value pairs.
Enter the keys named what_to_print and how_many_times then enter their
values. Use a string message for what_to_print's value and an integer
whole number above 0 for how_many_times. Our Python code's error handling
is not very robust so a value other than a number in the how_many_times
variable will cause the script to throw an error when it is executed due
to the forced casting of how_many_times via the int() function.

The Python 3.6 code and the environment variables are now in place. We just need to handle a few more AWS-specific settings before we can test the Lambda function.
Executing our Lambda Function
Scroll past the environment variables to the "Lambda function handler and role" section, which contains a few more required function configuration items.
Keep the default handler set to lambda_function.lambda_handler. Select
"Create a new Role from template(s)" from the drop-down then for the
"Role name" field enter "dynamodb_access". Under "Policy templates"
select the "Simple Microservice permissions".
The "Simple Microservice permissions" allows our Lambda to access AWS DynamoDB. We will not use DynamoDB in this tutorial but the service is commonly used either as permanent or temporary storage for Lambda functions.
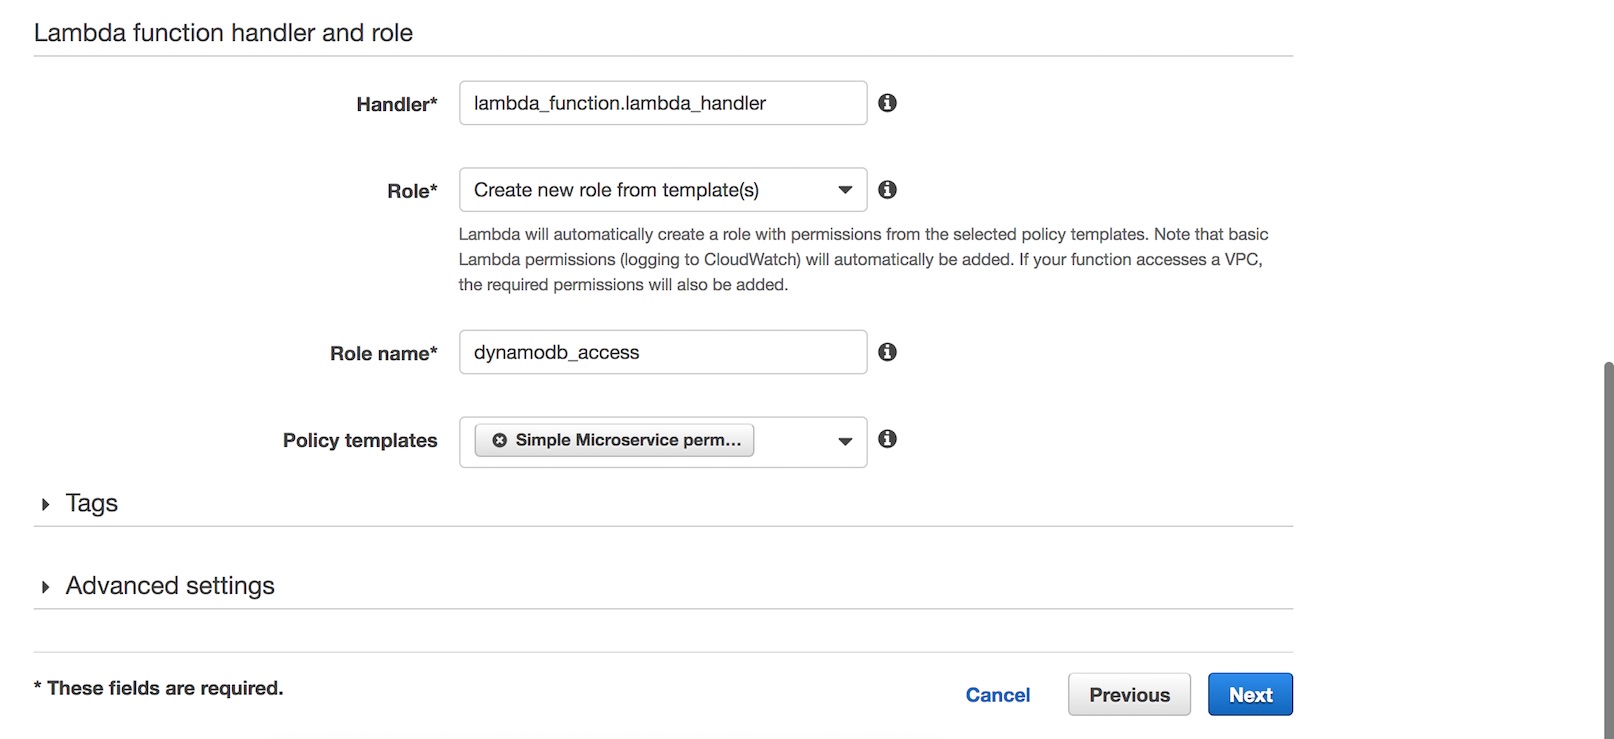
Our code and configuration is in place so click the "Next" button at the bottom right corner of the page.
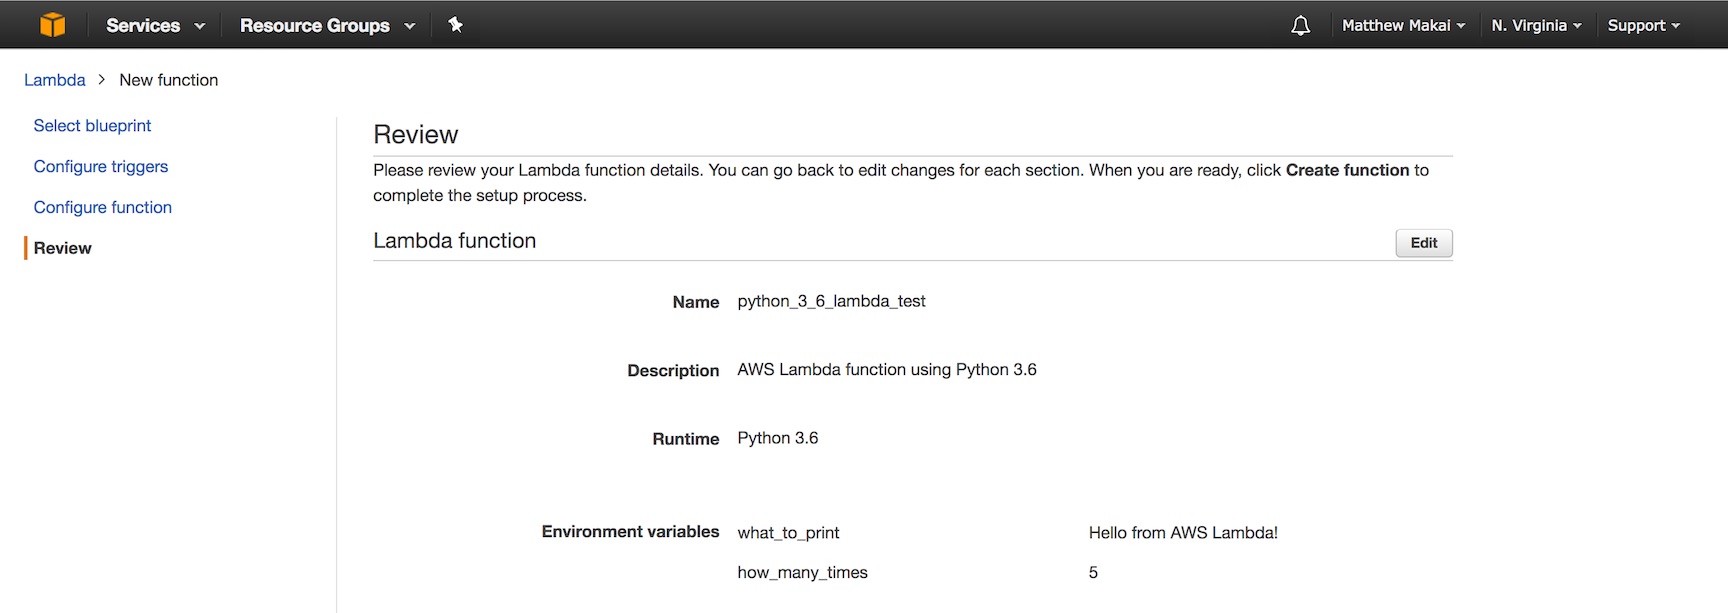
The review screen shows us our configuration settings to make sure we selected the appropriate values for our new Lambda function. Scroll down press "Create function".

Success message should appear on the next page below the "Test" button.

Click the "Test" button to execute the Lambda. Lambda will prompt us for some data to simulate an event that would kick off our function. Select the "Hello World" sample event template, which contains some keys but our Lambda will not use that in its execution. Click the "Save and test" button at the bottom of the modal.

Scroll down to the "Execution result" section where we can see our output.

The log output shows us the return value of our function, which in this
execution was the string message from what_to_print. We can also see
our print function produced output five times as expected based on the
amount set in the how_many_times environment variable.
Next Steps
You just configured, coded and executed your first Python 3.6 AWS Lambda function! The real power of Lambda comes in when you use triggers to your Lambda function so it executes based on events that happen. We will take a look at that in the next tutorial.
View the AWS Lambda Full Stack Python page for additional examples and tutorials that other folks have shared for Lambda with Python.
Questions? Contact me via Twitter @fullstackpython or @mattmakai. I am also on GitHub with the username mattmakai.
Something wrong with this post? Fork this page's source on GitHub and submit a pull request.
