How to Make Phone Calls in Python
Good old-fashioned phone calls remain one of the best forms of communication despite the slew of new smartphone apps that have popped up over the past several years. With just a few lines of Python code plus a web application programming interface we can make and receive phone calls from any application.
Our example calls will say a snippet of text and put all incoming callers into a recorded conference call. You can modify the instructions using Twilio's TwiML verbs when you perform different actions in your own application's phone calls.
Our Tools
You should have either Python 2 or 3 installed to build this application. Throughout the post we will also use:
- pip and virtualenv to handle application dependencies
- A free Twilio account to use their phone calling web API
- Twilio's Python helper library, version 5.7.0, which is available on PyPI
You can snag all the open source code for this tutorial in the python-twilio-example-apps GitHub repository under the no-framework/phone-calls directory. Use and copy the code for your own applications. Everything in that repository and in this blog post are open source under the MIT license.
Install App Dependencies
Our application will use the Twilio
Python helper library
to create an HTTP POST request to Twilio's API. The Twilio helper library is
installable from PyPI into a virtual
environment. Open your terminal and use the virtualenv command to create
a new virtualenv:
virtualenv phoneapp
Invoke the activate script within the virtualenv bin/ directory to make
this virtualenv the active Python executable. Note that you will need to
perform this step in every terminal window that you want the virtualenv to
be active.
source phoneapp/bin/activate
The command prompt will change after activating the virtualenv
to something like (phoneapp) $.
Next use the pip command to install the
Twilio Python package
into the virtualenv.
pip install twilio==5.7.0
We will have the required dependency ready for project as soon as the installation script finishes. Now we can write and execute Python code to dial phone numbers.
Our Python Script
Create a new file named phone_calls.py and copy or type in the following
lines of code.
from twilio.rest import TwilioRestClient


# Twilio phone number goes here. Grab one at https://twilio.com/try-twilio
# and use the E.164 format, for example: "+12025551234"
TWILIO_PHONE_NUMBER = ""

# list of one or more phone numbers to dial, in "+19732644210" format
DIAL_NUMBERS = ["",]

# URL location of TwiML instructions for how to handle the phone call
TWIML_INSTRUCTIONS_URL = \
  "http://static.fullstackpython.com/phone-calls-python.xml"

# replace the placeholder values with your Account SID and Auth Token
# found on the Twilio Console: https://www.twilio.com/console
client = TwilioRestClient("ACxxxxxxxxxx", "yyyyyyyyyy")


def dial_numbers(numbers_list):
    """Dials one or more phone numbers from a Twilio phone number."""
    for number in numbers_list:
        print("Dialing " + number)
        # set the method to "GET" from default POST because Amazon S3 only
        # serves GET requests on files. Typically POST would be used for apps
        client.calls.create(to=number, from_=TWILIO_PHONE_NUMBER,
                            url=TWIML_INSTRUCTIONS_URL, method="GET")


if __name__ == "__main__":
    dial_numbers(DIAL_NUMBERS)
There are a few lines that you need to modify in this application before it
will run. First, insert one or more phone numbers you wish to dial into the
DIAL_NUMBERS list. Each one should be a string, separated by a comma. For
example, DIAL_NUMBERS = ["+12025551234", "+14155559876", "+19735551234"].
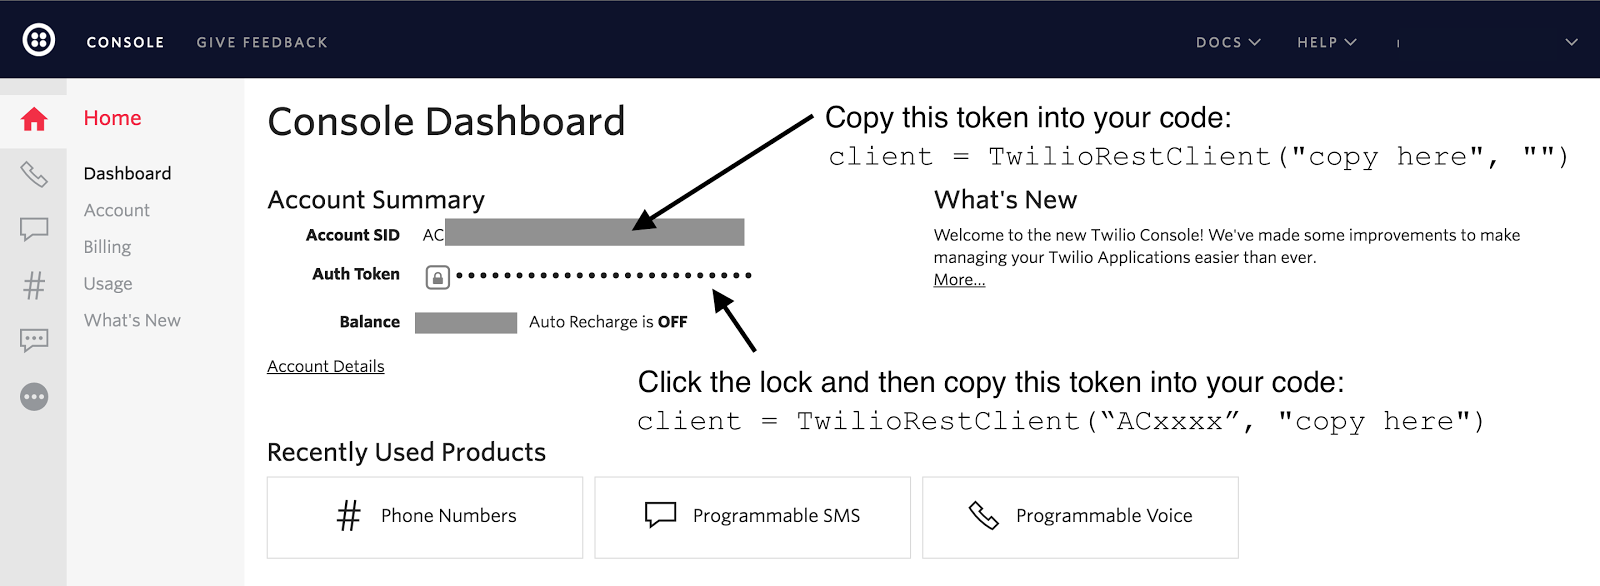
Next, TWILIO_PHONE_NUMBER and the Account SID and Authentication Token,
found on the client = TwilioRestClient("ACxxxxxxxxxx", "yyyyyyyyyy")
line, need to be set. We can get these values from the
Twilio Console.
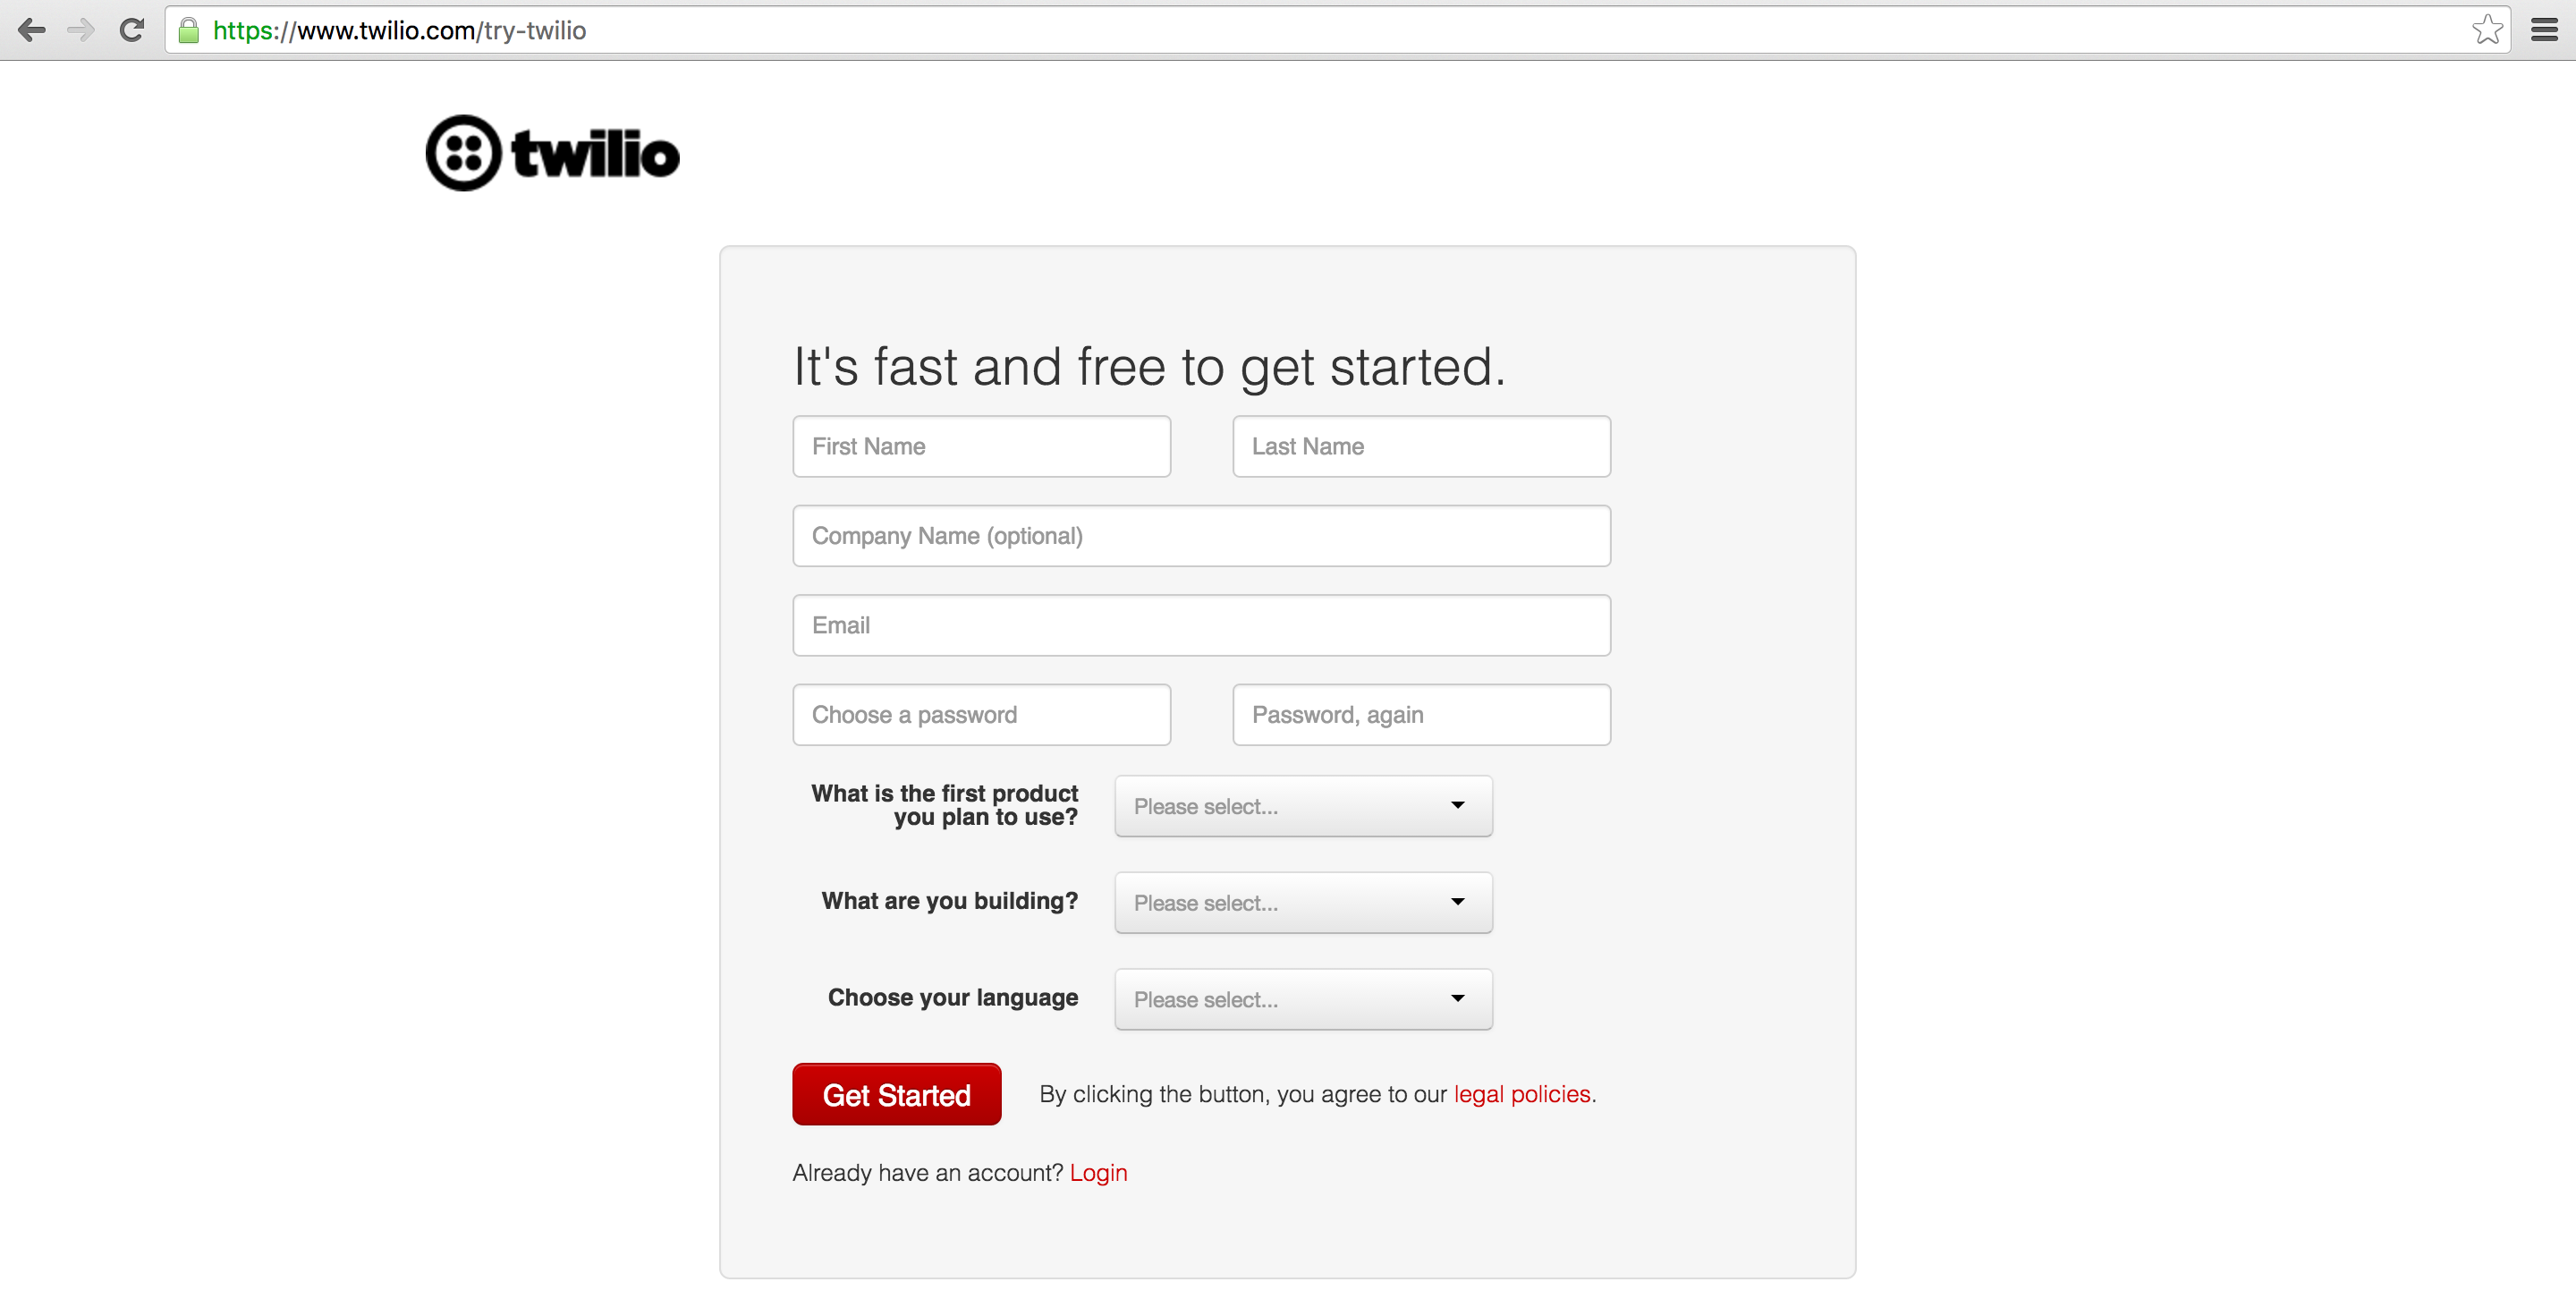
In your web browser go to the Twilio website and sign up for a free account or sign into your existing Twilio account.

Copy the Account SID and Auth Token from the Twilio Console and paste them into your application's code:

The Twilio trial account allows you to dial and receive phone calls to your own validated phone number. To handle calls from any phone number then you need to upgrade your account (hit the upgrade button on the top navigation bar).
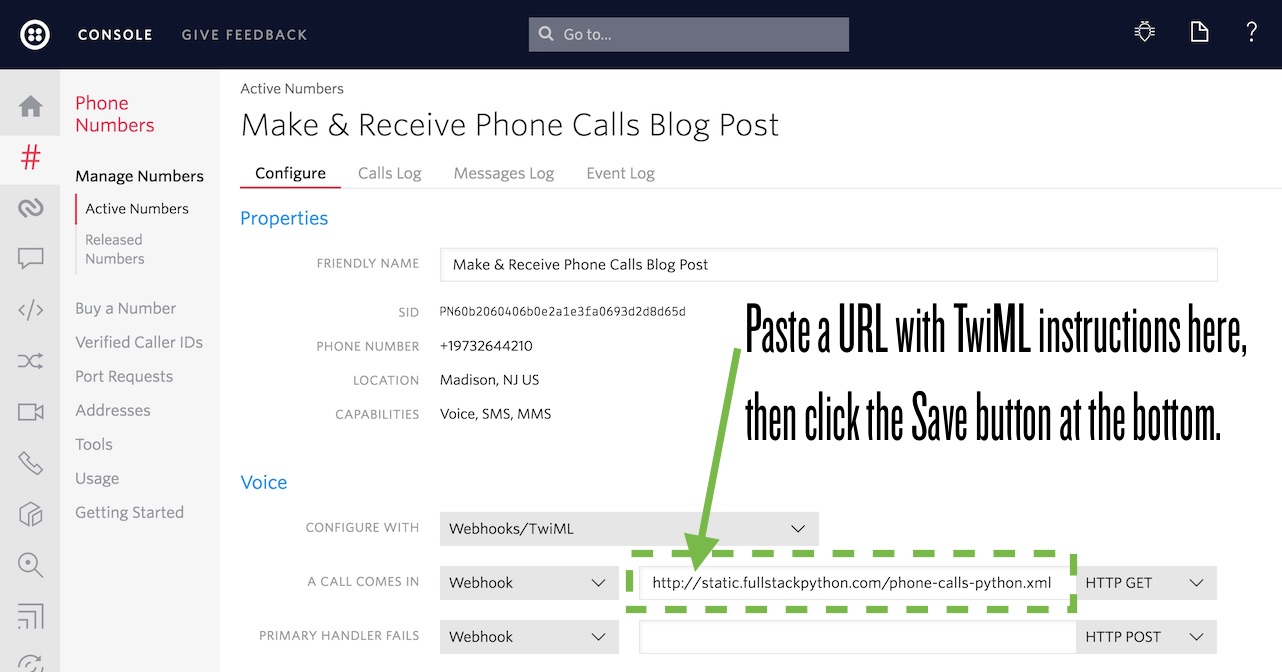
Once you are signed into your Twilio account, go to the manage phone numbers screen. On this screen you can buy one or more phone numbers or click on an existing phone number in your account to configure it.

After clicking on a number you will reach the phone number configuration
screen. Paste in the URL with TwiML instructions and change the dropdown from
"HTTP POST" to "HTTP GET". In this post we'll use
http://static.fullstackpython.com/phone-calls-python.xml, but that URL
can be more than just a static XML file.

The power of Twilio really comes in when that URL is handled by your web application so it can dynamically respond with TwiML instructions based on the incoming caller number or other properties stored in your database.
Under the Voice webhook, paste in
http://static.fullstackpython.com/phone-calls-python.xml and change the
drop-down to the right from "HTTP POST" to "HTTP GET". Click the "Save"
button at the bottom of the screen.
Now try calling your phone number. You should hear the snippet of text read by the Alice voice and then you will be placed into a conference call. If no one else calls the number then hold music should be playing.
Making Phone Calls
We just handled inbound phone calls to our phone number. Now it's time to
dial outbound phone calls. Make sure your phone_calls.py file is saved
and that your virtualenv is still activated and then execute the script:
python phone_calls.py
In a moment all the phone numbers you write in the DIAL_NUMBERS list
should light up with calls. Anyone that answers will hear our message read
by the "Alice" voice and then they'll be placed together into a recorded
conference call, just like when someone dials into the number.
Here is my inbound phone call:

Not bad for just a few lines of Python code!
Next Steps
Now that we know how to make and receive phone calls from a Twilio number that follows programmatic instructions we can do a whole lot more in our applications. Next you can use one of these tutorials to do more with your phone number:
- Build a phone-calling Slack bot
- Mask phone numbers for anonymous communication
- Add call tracking to see metrics for phone calls
Questions? Contact me via Twitter @fullstackpython or @mattmakai. I'm also on GitHub as mattmakai.
See something wrong in this post? Fork this page's source on GitHub and submit a pull request.
